How I Simplified My Setup and Shot One of My Cleanest Interviews Yet
Just a week after my chaotic, overpacked shoot in Memphis… I was back at it again — this time with a redemption plan. I swapped out gear, simplified my setup, and focused on what really matters: composition and storytelling.
In this blog post, I’m breaking down how I turned a tough lesson into one of my cleanest interviews yet!
Learning From Memphis
Not even a week after filming the sight-unseen location in Memphis, I found myself in Dickson, Tennessee, filming another group of teachers for the My Passion, My Community, My TEA campaign.
This was my chance to redeem myself — to apply everything I learned from the mistakes I made in Memphis.
So let’s start with what I packed this time around.
My Simplified Gear List
Sony FX3
Sony FX30
Sony 35mm f/1.8
Sony 50mm f/1.8
SmallRig 50W Batteries
Cables, Adapters, and XLR Cable
XLR Top Handle
Rode Boom Microphone
Boom Arm & Attachments
2 Tripods
C-Stand & Metal Light Stand
Amaran 200x
Aputure Light Dome III (with grid)
Amaran PT4c Light Tube
This setup was way easier to build and break down, aside from the tripods (which I’ve since upgraded). By streamlining what I brought, I was able to focus more on composition, which is key — because no matter how fancy your camera or lighting package is, you can’t overcome poor composition!
Framing First
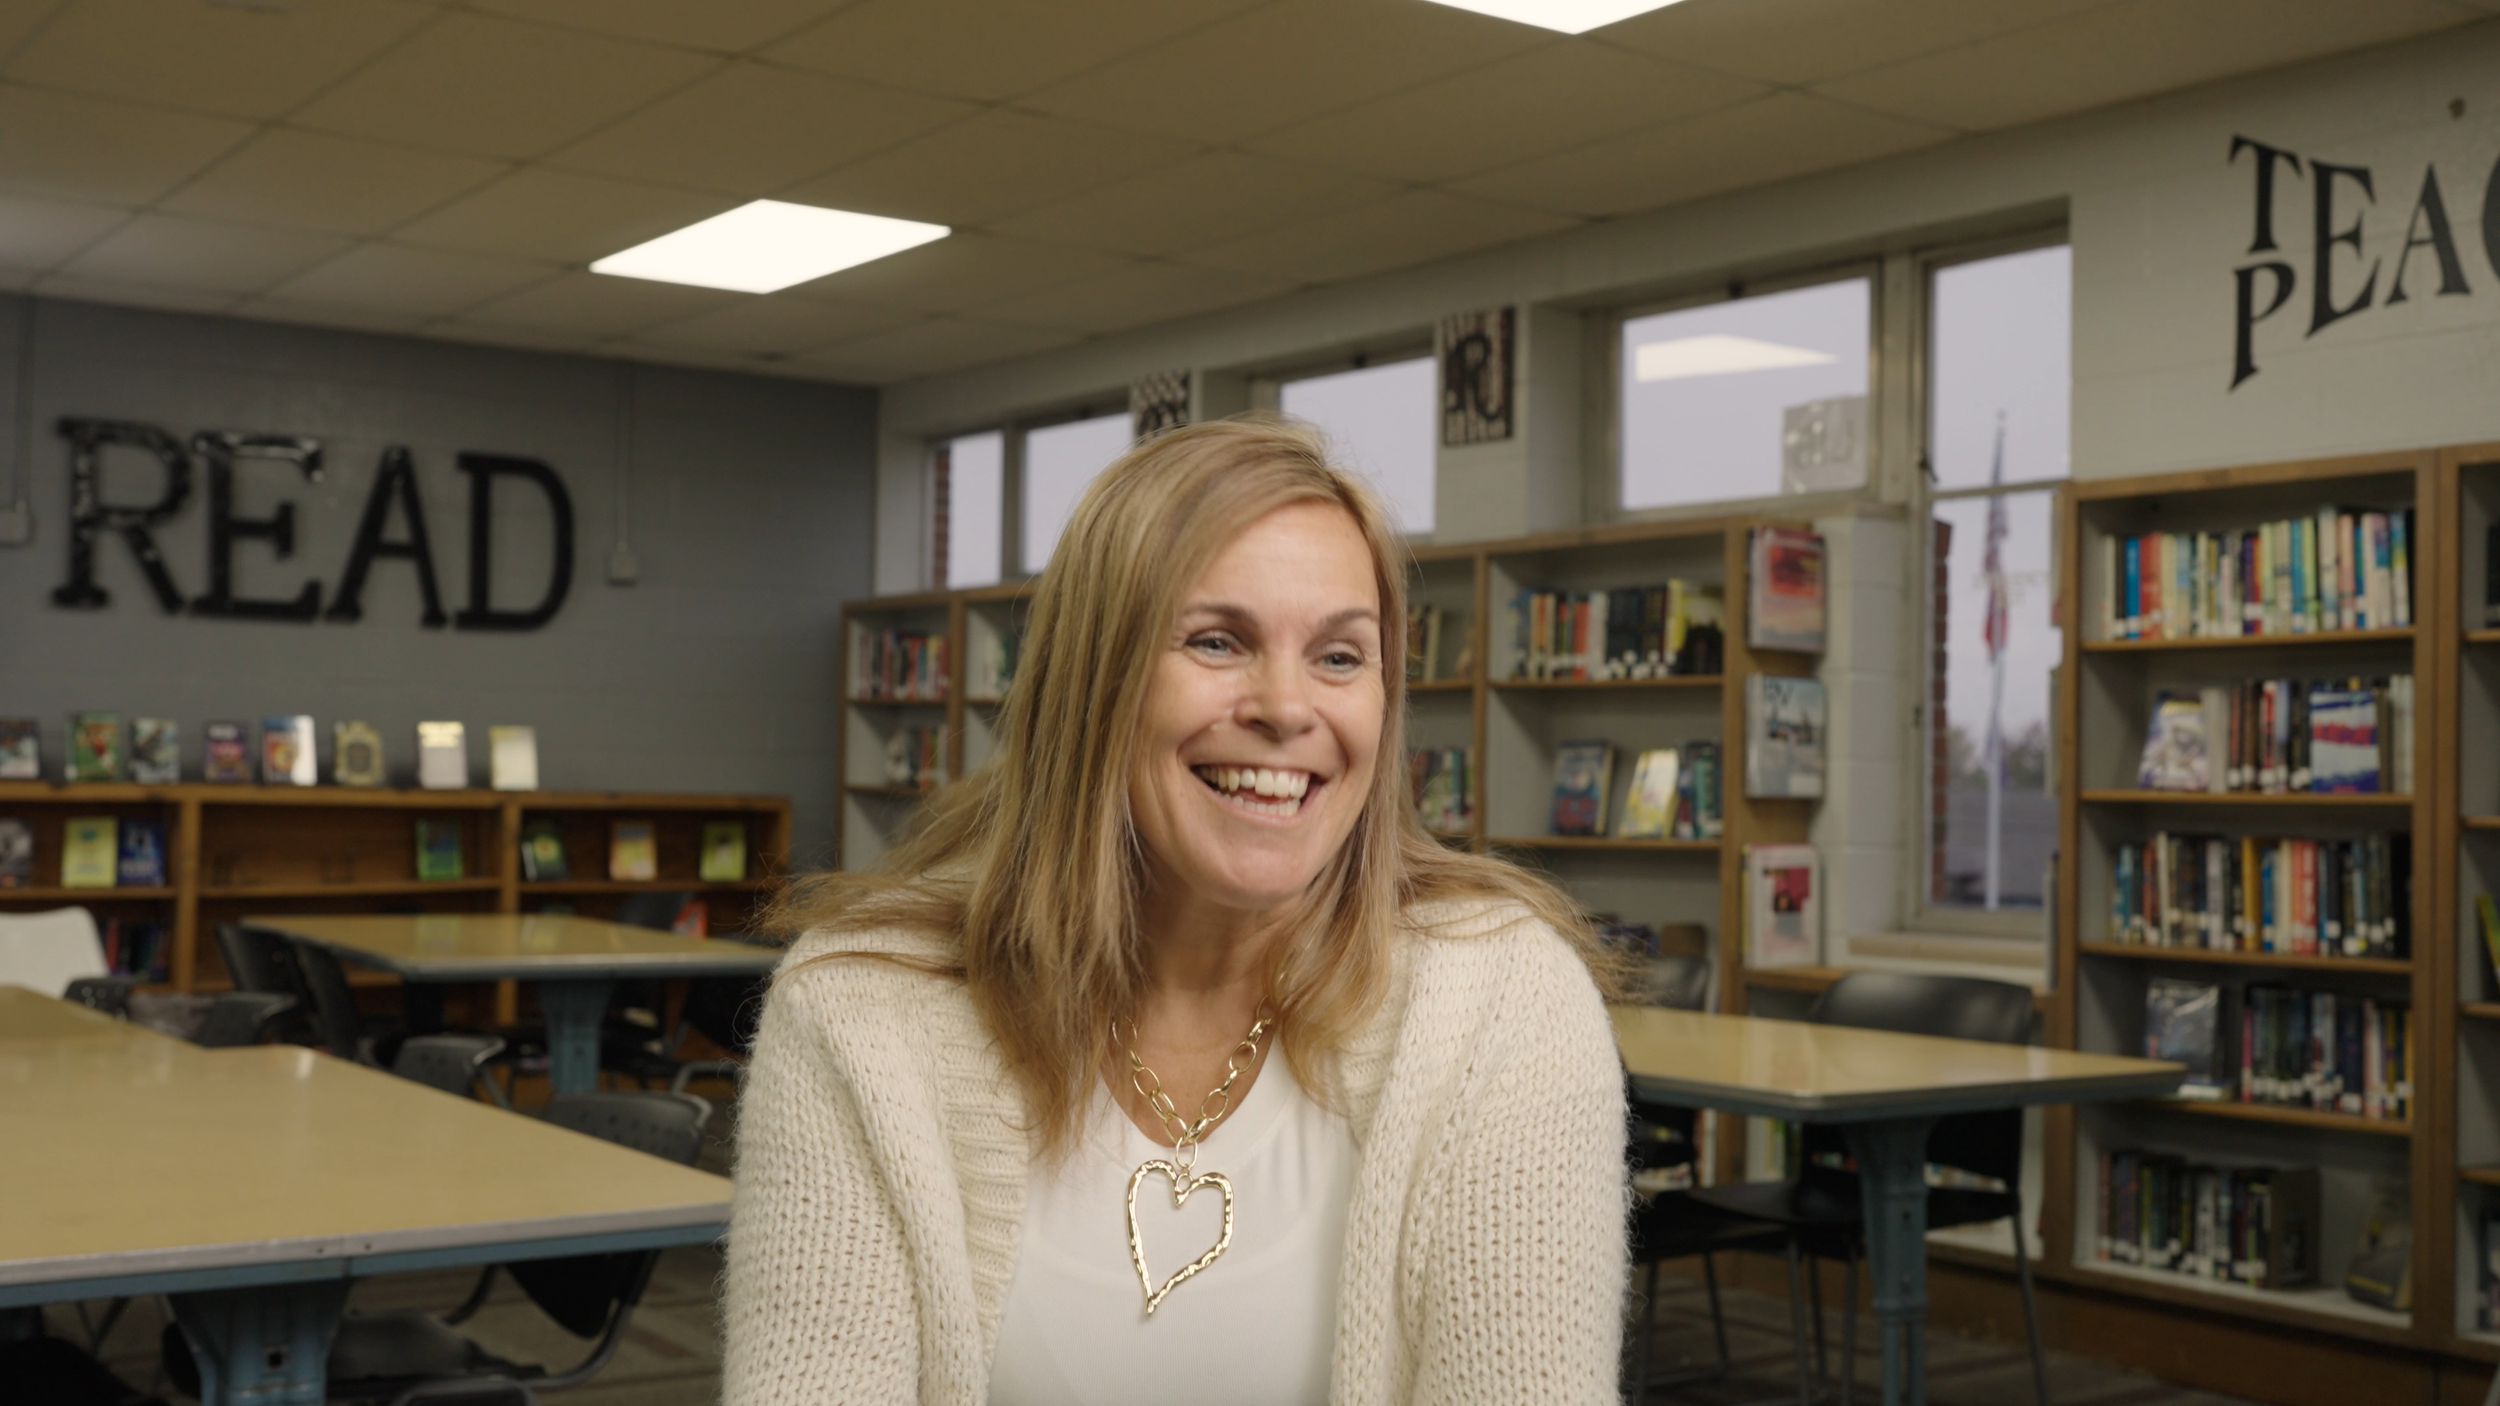
The first thing I did when I arrived was find my frame. Once I locked in my composition, I built the setup around that.
For this location, my composition came from the corner of the room, and what really made it work was the “Read” sign to the left of the subject. It added a perfect storytelling element — especially since these educators spoke so passionately about the importance of literacy.
Why I Ditched Accent Lighting
Before this shoot, I had a habit of always trying to throw in accent lighting. Don’t get me wrong — accent lighting can be great and often necessary. But for sight-unseen locations, it’s not always practical and can easily become overkill.
These days, I don’t even think about bringing extra accent lights unless I know the environment ahead of time. For this shoot, something like the MC Pros would have worked better than the random light tube illuminating the “Read” sign.
The key lesson here: if you don’t know the space you’re walking into, travel light and adapt on the spot. Half-day shoots especially don’t give you time to overcomplicate things.
Using the Rule of Thirds
Once everything was set up, I made sure to compose the interview using the rule of thirds — not only for visual balance but also to give myself flexibility in post. That way, I could easily reframe for 9:16 or 1:1 aspect ratios without losing quality.
If I could change one or two things about this setup, I would’ve:
Tried turning off half or all the overhead lights in the room
Moved the boom mic in closer and directed at the subjects chest
Other than that, I loved how these interviews turned out. The setup was smooth, the breakdown was quick, and I didn’t feel the exhaustion of everyone waiting to go home after a long day of teaching — for pennies and nickels….
Key Takeaway
This shoot was part of what I like to call my redemption tour — taking what I learned from my first two-camera interview and showing real growth.
By bringing less gear and focusing on what truly matters — framing and composition — I proved that you can produce professional results with minimal tools when you have the knowledge, skills, and creative eye.
If you want to see the full story, check out the video on my YouTube channel!

